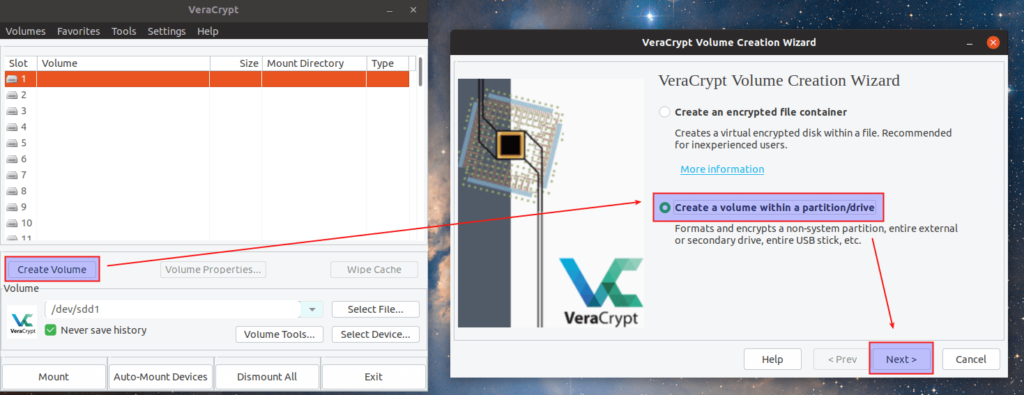
This encryption method also applies to creating an encrypted volume on your SSD or harddrive of any size.
So why use VeraCrypt?
VeraCrypt is an open-source utility for on-the-fly encryption for Windows, Mac OSX and Linux. The software can create a virtual encrypted disk that works just like a regular disk but within a file. It can also encrypt a partition or the entire storage device with pre-boot authentication. VeraCrypt is a fork of the discontinued TrueCrypt project.
Wikipedia
The blurb from the official site — VeraCrypt is based on TrueCrypt 7.1a. Its main features:
- Creates a virtual encrypted disk within a file and mounts it as a real disk.
- Encrypts an entire partition or storage device such as USB flash drive or hard drive.
- Encrypts a partition or drive where Windows is installed (pre-boot authentication).
- Encryption is automatic, real-time(on-the-fly) and transparent.
- Parallelization and pipelining allow data to be read and written as fast as if the drive was not encrypted.
- Encryption can be hardware-accelerated on modern processors.
- Provides plausible deniability, in case an adversary forces you to reveal the password: Hidden volume (steganography) and hidden operating system.
- More information about the features of VeraCrypt may be found in the documentation
Let’s get to encrypting data — making your USB unreadable by anyone who does not have the proper password. Follow this backup and encryption practice for your removable devices.
Install the VeraCrypt container
First, install VeraCrypt on your computer. Windows and Mac instructions are straightforward. Download and install.
To Use VeraCrypt in Linux, enter the following commands in a Terminal in Ubuntu or an Ubuntu-based distro:
- sudo add-apt-repository ppa:unit193/encryption
- sudo apt update
- sudo apt install -y veracrypt

Now to create the encrypted volumes that will contain all your data you want to safeguard:
- Click “Volumes” > “Create New Volume” > “Create an Encrypted File Container”
- Choose “Standard VeraCrypt volume”
- Click “Select File” and choose a name like “Backup”. Select your USB device
- Click “Save” > “Next” > “Next”
- Choose your volume size. Since we are going to use the entire USB stick, round down the volume size and enter a volume size slightly less than the specified limit
- Move your cursor all over the screen to increase the entropy for encryption
- When finished, click “Format”
Your encrypted container is created!
To store data on your encrypted container, mount it:
- Open VeraCrypt, click Select File, choose the “Backup” file on the USB, select “Mount”, enter the password, and now you should see this new drive available on your computer. The appearance of this new drive means your container is mounted.
Backing up your VeraCrypt container:
- Back up your stuff! Back up important data often and make sure it is all encrypted. If you back up your container to another drive, you can use an open source solution like Free File Sync.
- Back up your encrypted VeraCrypt container to another fully encrypted disk, ideally. This way you’ll have protected your data with two passwords. Keep a rolling copy of your KeePassXC passwords in there, too.
- If you really want to ensure your data redundancy strategy is top-notch, consider syncing your encrypted container with Free File Sync to another drive that you store off-site. Cloud storage is okay too, as long as you encrypt everything.